Infuse your home with nostalgia using top DIY vintage decor ideas, starting with upcycled mason jar lanterns that add a charming glow indoors or outdoors. For functional flair, create distressed wooden shelves for rustic storage or convert an old ladder into a bookshelf, offering unique display options. Add elegance with vintage lace table runners and vintage fabric throw pillows, providing a touch of history through textiles. Transform old frames with chalkboard paint to make versatile memo boards. Finally, a rustic pallet coffee table or an antique mirror gallery wall can serve as stunning focal points, leaving more inspiration to discover.
Key Points
- Upcycle mason jars into lanterns using tea lights and wire handles for a cozy vintage ambiance.
- Transform wooden pallets into rustic coffee tables by sanding, stacking, or adding wheels for versatility.
- Repurpose vintage suitcases as side tables with added legs for both function and nostalgia.
- Convert mismatched teacups into candle holders with wax and wicks for vintage elegance.
- Create a ladder bookshelf by painting and securing a wooden ladder against a wall for unique storage.
Upcycled Mason Jar Lanterns
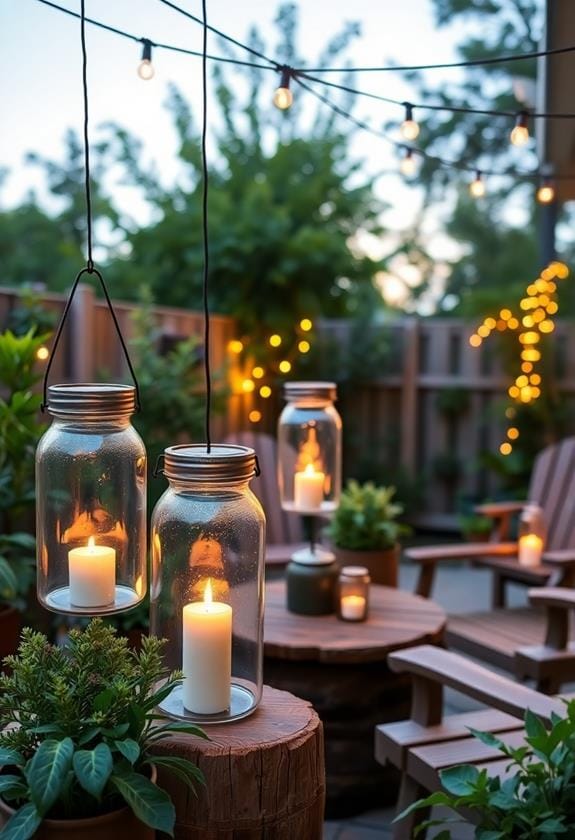
Transforming ordinary mason jars into charming lanterns is a delightful way to add vintage flair to your space. You'll find the process rewarding and surprisingly simple. Start by gathering a few mason jars, some tea light candles or LED lights, and wire for handles. First, clean the jars thoroughly, making sure they're free of labels and residue. Next, decide whether you'd like to paint the jars or leave them clear for a more traditional look. If you choose to paint, consider using frosted glass spray paint or a soft pastel hue to enhance the vintage appeal. For additional creative ideas, you might explore DIY home decor projects that use mason jars in various innovative ways.
Once the jars are prepared, attach wire handles. Cut a length of wire, wrap it around the jar's neck, and twist it securely. Form a loop for hanging by bending the wire into a handle shape. Verify it's tight enough to support the weight of the jar and candle. Finally, place a tea light or LED light inside. LED lights are safer and last longer, especially if you plan to hang your lanterns outside. Once complete, hang these lovely lanterns on hooks or branches to create a cozy ambiance, perfect for evenings spent with loved ones.
Distressed Wooden Shelves
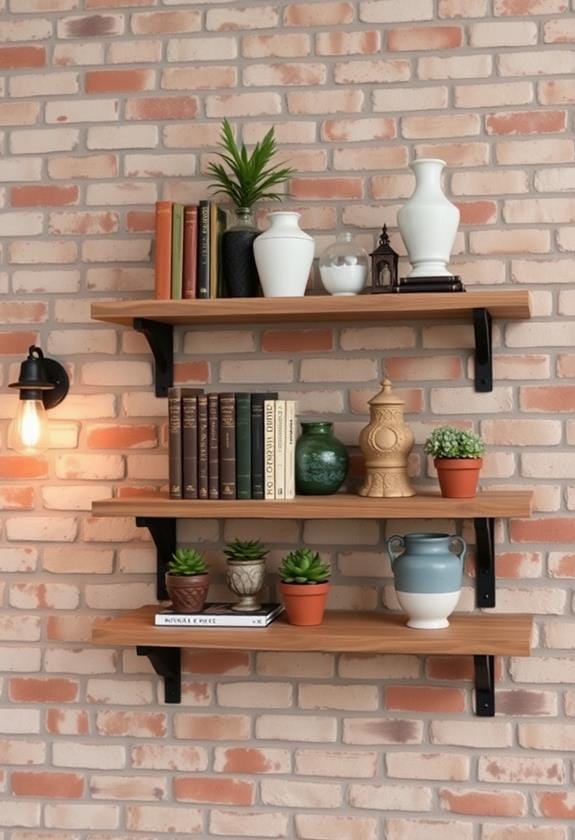
As you illuminate your space with charming mason jar lanterns, consider enhancing the vintage atmosphere with distressed wooden shelves. These shelves not only offer functional storage but also add an authentic touch of rustic charm to your home. Distressed wooden shelves are perfect for displaying cherished antiques or books, creating a lived-in, cozy feel. You can achieve this look by repurposing old wood or buying new wood and distressing it yourself. For those interested in a cohesive farmhouse style, explore other DIY farmhouse decor ideas that complement these shelves.
Start by selecting your wood, ensuring it has a natural grain and character. To distress, use sandpaper to roughen the edges and surface, giving it a worn appearance. For added character, try using a hammer or chisel to create small dents and imperfections, mimicking years of use. Once you've achieved the desired level of distress, apply a wood stain in a color that complements your existing décor, allowing the grain to show through for a natural look.
Mount your shelves securely on the wall, using brackets that blend into the vintage aesthetic. They're not only practical but also a striking focal point, inviting guests to admire both your creativity and the charming treasures they hold.
Vintage Lace Table Runners
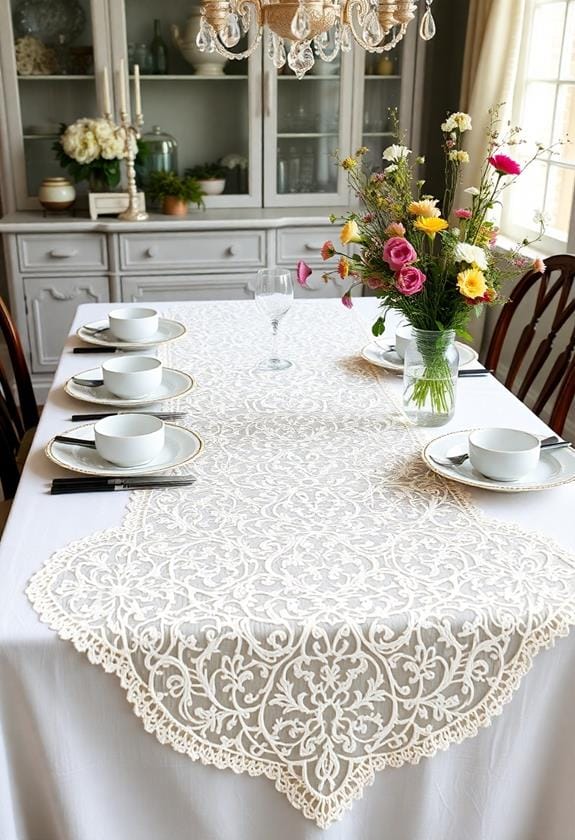
Add a touch of elegance to your dining space with vintage lace table runners. These timeless pieces transform any table setup into a charming, nostalgic scene. They're not just reserved for special occasions; you can use them daily to add sophistication to your meals. Vintage lace table runners are versatile; they complement various decor styles, whether your home has a rustic, shabby chic, or classic vibe. When choosing a runner, consider colors like ivory, cream, or white, as these hues tend to blend seamlessly with most table settings. Pairing the runners with earthy tones or textured textiles, like burlap or linen, enhances the rustic charm and provides a cohesive look.
To create your own vintage lace table runner, start by sourcing lace fabric from thrift stores, antique shops, or even your grandmother's linen closet. Look for pieces with intricate patterns and delicate details. Measure your table to determine the ideal length, allowing for a slight overhang on each side. Once you have your fabric, trim it to size, ensuring the edges are neat. If you're crafty, you can add a simple hem or fringe for a finished look. Pair your lace runner with simple dinnerware and soft candlelight to enhance its beauty. This project not only beautifies your space but also preserves a piece of history.
Antique Mirror Gallery Wall
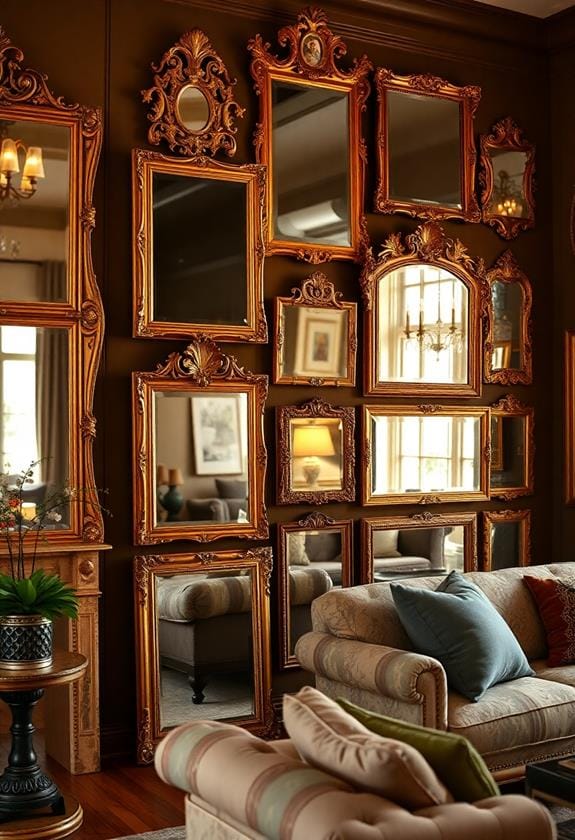
Vintage decor isn't limited to your table; it can extend to your walls with an antique mirror gallery wall. This enchanting decor idea adds depth and character to any room, transforming your space into a unique reflection of timeless style. Start by sourcing mirrors from flea markets or thrift stores—look for those with ornate frames or aged patinas. These elements bring charm and history, making each mirror a conversation piece. For more DIY vintage home decor projects, consider incorporating other antique pieces like vintage clocks or rustic wall hooks to complement your mirror gallery.
To create balance, mix and match different shapes and sizes. Arrange them on the floor first to find a layout that feels harmonious before committing to the wall. You might consider a symmetrical arrangement for a more formal look or go asymmetrical for a relaxed, eclectic vibe. Don't forget to measure and level carefully; precision guarantees the mirrors are both functional and beautiful.
As you hang your mirrors, keep in mind their reflective properties, which can enhance natural light and make your room appear larger. Consider placing them opposite windows to maximize this effect. An antique mirror gallery wall isn't just decoration; it's an artistic expression that melds past and present, offering a glimpse into the stories each mirror holds.
Rustic Pallet Coffee Table
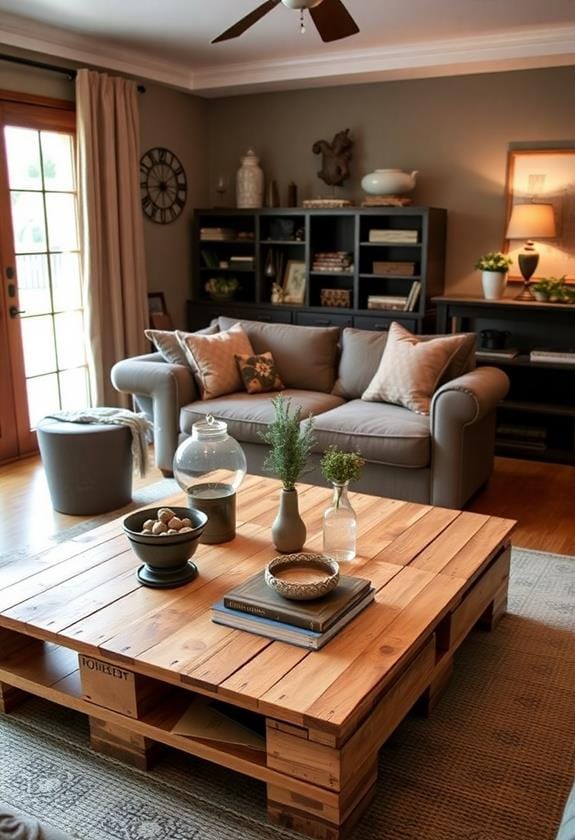
Beneath the charm of rustic decor lies the simplicity and versatility of a pallet coffee table. It's a project that you'll find both rewarding and practical. Start by sourcing wooden pallets, often available at local hardware stores or online marketplaces. Look for pallets in good condition, free from excessive splinters or cracks, to guarantee durability. Once you've selected your pallets, sand them thoroughly to smooth any rough edges, ensuring a finish that's both safe and attractive.
Next, decide on the table's height and functionality. You can stack multiple pallets for a sturdier look, or even add wheels for mobility. Attach the pallets using sturdy brackets or screws, reinforcing the structure for stability. Consider adding a glass top for a polished look and easy cleaning, or simply leave it raw for a truly rustic feel. Stain or paint the wood to match your home's color scheme, or leave it natural for an authentic touch. Incorporating personal touches like a vintage vase or a stack of old books can enhance the aesthetic appeal.
This project doesn't just add character to your living space; it's also an environmentally friendly way to repurpose materials. With a bit of time and effort, you'll have a unique centerpiece that blends vintage charm with modern functionality.
Repurposed Suitcase Side Table
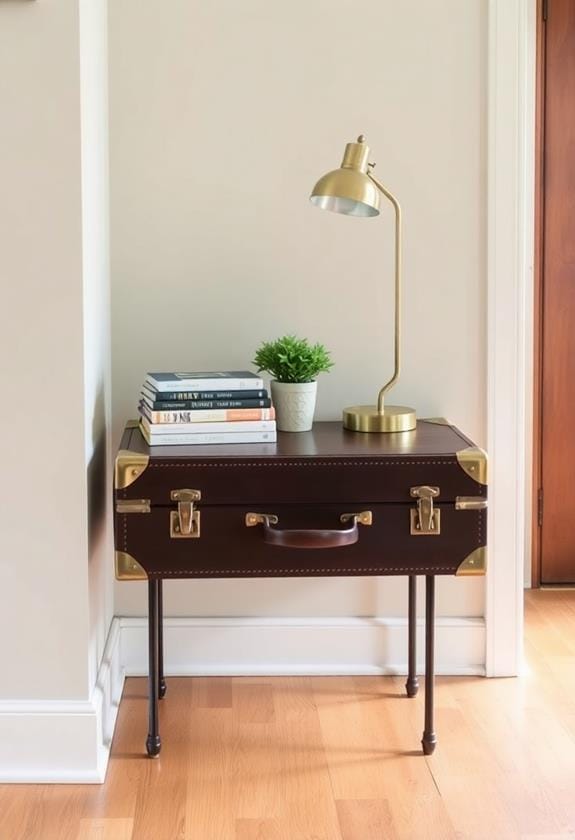
Transforming an old suitcase into a charming side table is a creative way to blend functionality with nostalgia. Start by selecting a vintage suitcase with a sturdy frame, ensuring it can support the weight of items you plan to place on it. Look for suitcases with unique patterns or textures that complement your existing decor. Clean it thoroughly to remove any dust or lingering odors, and consider applying a protective finish if the material allows.
Next, attach legs to your suitcase to elevate it to table height. You can find pre-made furniture legs at most hardware stores. Choose legs that match the style of your suitcase and your room, whether they're sleek and modern or ornate and antique-looking. Secure them to the bottom of the suitcase with screws, making sure they're evenly spaced to provide stability.
Once your table is assembled, think about how you'll style it. Use the suitcase's interior for hidden storage, perfect for magazines or remote controls. On top, place a lamp or decorative items to enhance its charm. This project not only repurposes an old item but also adds a personal touch to your space, reflecting your unique taste.
Vintage Fabric Throw Pillows
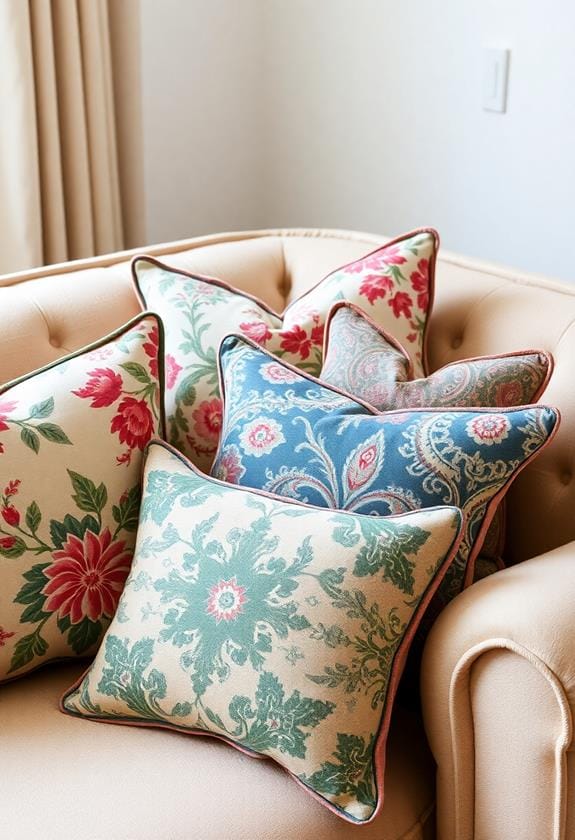
When you're looking to add a touch of charm and history to your living space, consider crafting vintage fabric throw pillows. These pillows not only enhance the aesthetic of any room but also offer a cozy and inviting atmosphere. To start, seek out vintage fabrics at thrift stores, flea markets, or even your own attic. Look for unique patterns, textures, and colors that resonate with you and your home's palette.
Once you've gathered your materials, cut the fabric to your desired pillow size, leaving an extra inch on all sides for seams. Stitch the pieces together, ensuring the pattern aligns nicely. If you're new to sewing, using a simple straight stitch will suffice. For those who are more experienced, try adding decorative trims or buttons for an extra vintage flair.
Stuff the pillow with high-quality filling to maintain its shape and comfort. If you prefer an eco-friendly approach, consider using recycled materials. Finally, hand-stitch the opening closed carefully.
Chalkboard Painted Frames

After adding vintage fabric throw pillows to your decor, consider enhancing your space further with chalkboard painted frames. These frames offer a unique blend of functionality and aesthetic appeal, making them a versatile choice for any vintage-inspired interior. You can easily transform an old frame into a chic chalkboard with a few coats of chalkboard paint. It's a simple, creative project that lets you customize messages or art to suit your mood or season.
Start by selecting frames with interesting shapes or ornate details, often found at thrift stores or garage sales. Clean them thoroughly, then apply a couple of coats of chalkboard paint, allowing each layer to dry completely. For added creativity, you might also explore using DIY Washi Tape to embellish the frames, adding unique patterns or colors. Once you've painted the frame, you can also distress it slightly with sandpaper to enhance its vintage feel. The result is a personalized piece that can serve as a memo board in the kitchen, a whimsical welcome sign in the entryway, or even a rotating art piece in your living room.
Chalkboard painted frames not only add a touch of vintage charm but also offer practical uses. You'll find it rewarding to incorporate this creative element, adding both style and function to your home.
Old Ladder Bookshelf
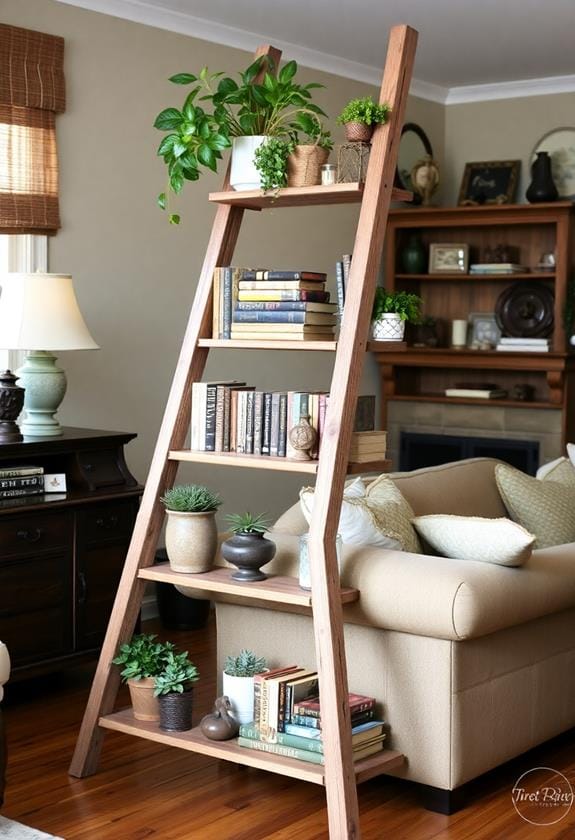
Have you ever considered turning an old wooden ladder into a quirky bookshelf? This inventive idea not only adds a touch of vintage charm to your living space but also repurposes an item you might already have. Start by selecting a sturdy wooden ladder. It can be a classic A-frame or a straight ladder, depending on your space and style preference. Give it a thorough cleaning to remove dust and debris, and sand it down to smooth any rough edges. For additional inspiration, explore affordable DIY home decor ideas that complement your vintage aesthetic.
Next, decide on a finish—whether you'd like to keep it rustic with a natural wood stain or add a pop of color with paint. Once dry, position the ladder against a wall, angling it slightly for stability. Secure it with brackets if necessary, ensuring safety and sturdiness.
Now, it's time to get creative with your shelving. Use the rungs to hold unique items like books, small plants, or decorative knick-knacks. Place wooden planks across the rungs to create broader shelves for larger items. This project not only provides functional storage but also transforms your ladder into a personalized statement piece, blending practicality with vintage aesthetics.
Teacup Candle Holders
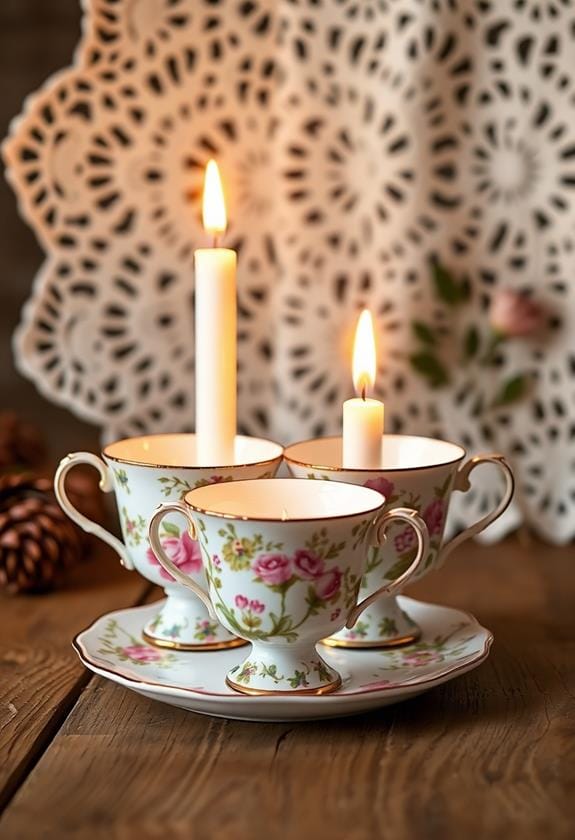
Transform your collection of mismatched teacups into charming candle holders that exude vintage elegance. Start by choosing teacups with patterns or colors that resonate with your home's decor. Mixing different styles adds character and aligns well with rustic decor fundamentals. Gather your materials: wax flakes, candle wicks, a double boiler, and your favorite essential oils for scent.
Begin by securing the wick in the center of the teacup using a dab of hot glue or wick stickers. This guarantees it stays upright when you pour the wax. Melt the wax flakes in the double boiler over medium heat, stirring occasionally. Once melted, remove from heat and add a few drops of essential oil, stirring gently to combine.
Carefully pour the wax into each teacup, leaving some space at the top. Use a chopstick or skewer to keep the wick centered as the wax cools. Allow the wax to set completely, which may take several hours. Once solidified, trim the wick to about a quarter-inch.
Place your new teacup candle holders around your home, enjoying the warm glow and delightful fragrance they bring. This simple yet effective project adds a touch of nostalgia and warmth to any room.
Frequently Asked Questions
How Can I Ensure My Vintage Decor Items Are Safe for Children and Pets?
To guarantee your vintage decor is safe for children and pets, practice precaution and prioritization. Secure shelves sturdily, preventing precarious placement of items. Choose non-toxic materials, avoiding those with sharp edges. Seal antique pieces with safe varnish, shielding surfaces from curious hands and paws. Opt for sturdy, shatterproof alternatives where possible. Regularly inspect for wear, and repair as needed, guaranteeing every elegant element enhances your home's harmony without hazard.
What Are the Best Places to Source Authentic Vintage Materials for Decor Projects?
You'll find authentic vintage materials by exploring local thrift stores, estate sales, and flea markets, where unique items often surface. Online platforms like eBay and Etsy also offer a wide selection, allowing you to compare prices and authenticity. Don't overlook auctions, both online and local; they can be treasure troves for vintage finds. Always verify the authenticity by researching the item's history, ensuring your decor projects maintain their vintage charm.
How Do I Maintain and Clean Vintage Decor Items Without Damaging Them?
When it comes to maintaining and cleaning your vintage decor, there's a delicate balance to strike. You'll want to start by dusting gently with a soft cloth, ensuring you don't scratch any surfaces. Use mild soap and water for more stubborn spots, testing on a hidden area first. For metal pieces, a mixture of vinegar and water works wonders. Always dry thoroughly to prevent any moisture damage, preserving your treasures for years to come.
Can Vintage Decor Be Incorporated Into a Modern-Style Home?
Absolutely, you can seamlessly blend vintage decor with a modern-style home. Start by selecting pieces that complement your existing color scheme or introduce a unique contrast. Mix materials like aged wood with sleek metals for an eclectic look. Focus on balance; too many vintage items can overwhelm, so integrate them sparingly. Consider using vintage pieces as focal points, like a statement mirror or a classic armchair, to create harmony between the styles.
What Are Some Tips for Mixing Different Vintage Styles in One Room?
Mixing different vintage styles in one room can feel like juggling a million flaming torches. Start by choosing a unifying element, like color or texture, to create harmony. Balance is key; if you've got a bold Victorian piece, complement it with subtler mid-century accents. Layering textures adds depth, so mix materials like wood, metal, and fabric. Remember, each piece should stand out individually but also contribute to the room's overall aesthetic.


