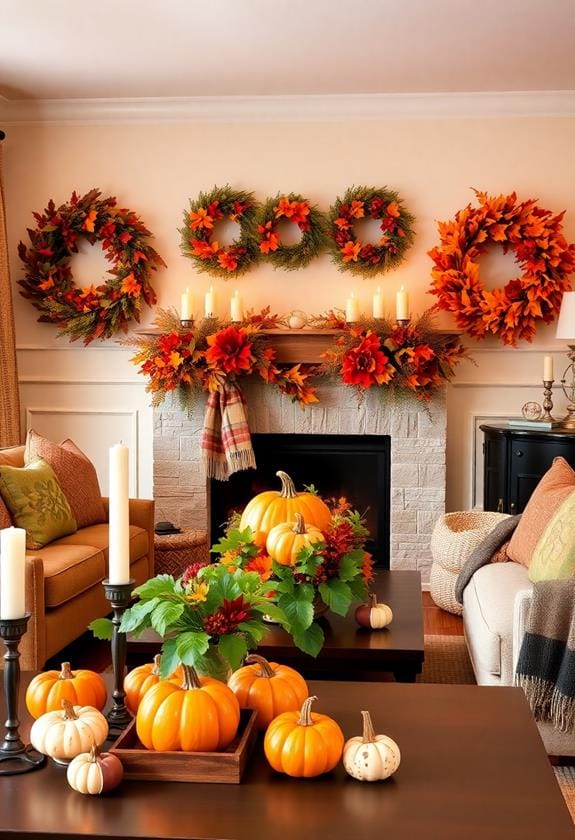
Transform your home each season with these 10 creative DIY decor crafts. Start with a vibrant spring floral wreath using grapevine as a base, adding tulips and daisies for color. Summer calls for a seashell garland; just drill and string together your seaside finds. Autumn leaf lanterns use fallen leaves adhered to glass jars with Mod Podge, perfect for a warm glow. Craft snowflake ornaments from craft sticks and glitter to welcome winter. Explore more with Easter egg centerpieces, Thanksgiving table runners, and Christmas tree advent calendars, plus unique creations for Fourth of July, Halloween, and New Year's Eve festivities. Explore further for innovative ideas.
Key Points
- Create vibrant Spring Floral Wreaths using grapevine bases, colorful blooms, and greenery for a refreshing seasonal touch.
- Design Easter Egg Centerpieces with dyed eggs and fresh flowers for a lively spring table decoration.
- Craft Autumn Leaf Lanterns by adhering colorful leaves to glass jars with Mod Podge for cozy autumn lighting.
- Build Winter Snowflake Ornaments using craft sticks, glue, and glitter for a sparkling addition to winter decor.
- Assemble Fourth of July Banners with red, white, and blue materials for festive patriotic displays.
Spring Floral Wreaths

Spring's vibrant colors and fresh blooms make it the perfect time to craft your own floral wreath. It's a rewarding way to bring the season's beauty indoors. Start by choosing a base, like a grapevine or wire wreath, easily found at craft stores. These provide a sturdy foundation for your flowers and greenery. To enhance the design, consider incorporating budget-friendly diy elements that add a unique touch. Select a variety of blooms in complementary colors, incorporating different textures to add depth. Think tulips, daisies, or even faux flowers for longevity.
Begin by cutting the stems of your flowers to about six inches. This length makes it easier to weave them into the base. Secure each stem with floral wire, wrapping tightly so they stay in place. Mix in some greenery, like eucalyptus or ferns, to enhance the natural look of your wreath. As you build, step back occasionally to guarantee balance and symmetry.
Once satisfied, add a personal touch, like a ribbon or a small decorative element, such as a bird or butterfly. This adds character and reflects your style. Hang your wreath on a door or wall, and admire how it brightens your space, celebrating spring's arrival with elegance and charm.
Summer Seashell Garlands

Transform your home into a summer oasis with a DIY seashell garland. Imagine the gentle ocean breeze, the sound of waves, and the warm sand between your toes—all encapsulated in a simple, elegant decoration. To start, gather an assortment of seashells, which you can find along the shore or purchase from a craft store. You'll want to vary the sizes and shapes for visual interest. Next, choose a sturdy twine or string that complements your home's decor. This will serve as the backbone of your garland, supporting the seashells.
Follow these steps to create your garland:
- Lay out your seashells to determine the order and spacing.
- Use a small drill or a strong needle to create holes in the tops of the shells.
- Thread the twine through the holes, knotting each shell in place.
After assembling your garland, hang it in a sunny window, drape it over a mantel, or let it cascade down a staircase. This craft not only brings the beach into your home but also offers a personal touch, showcasing your creativity and love for the summer season. Enjoy the coastal charm!
Autumn Leaf Lanterns
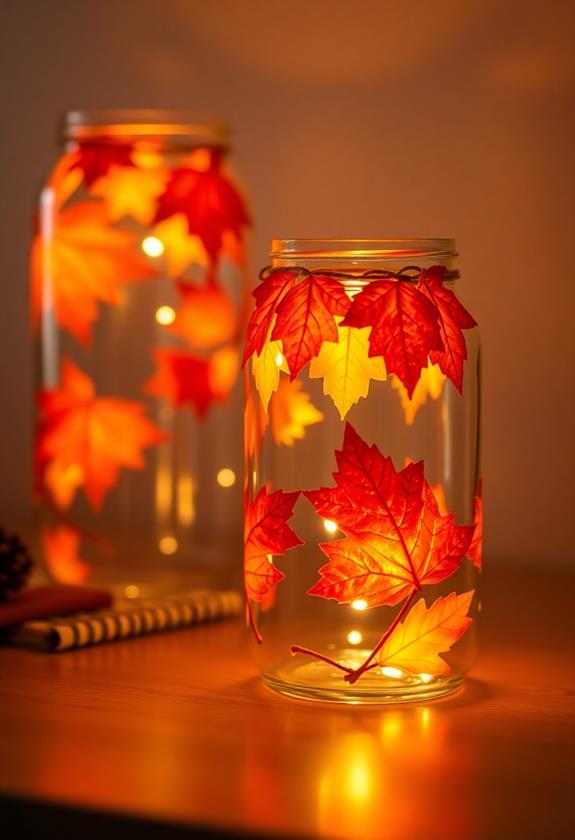
As summer's warmth fades and the leaves begin their colorful transformation, it's the perfect moment to bring the beauty of autumn into your home with DIY Autumn Leaf Lanterns. These charming lanterns capture the essence of fall, casting a warm, inviting glow that echoes the season's vibrant hues. To create your own, you'll need a few basic supplies: glass jars, Mod Podge, a foam brush, and of course, a collection of colorful autumn leaves. For more budget-friendly ideas, you can explore cheap holiday home decorating ideas to enhance your creative projects.
Start by gathering leaves, opting for a variety of shapes and colors to enhance visual interest. Clean the glass jars thoroughly, ensuring they're free of any dust or residue. Apply a thin layer of Mod Podge to the jar's exterior using the foam brush. Carefully press the leaves onto the jar, smoothing them gently to prevent air bubbles. Once your arrangement is complete, brush another layer of Mod Podge over the leaves to seal them in place. Let the lantern dry completely before using.
When finished, place a tealight candle inside each jar. The flickering light will illuminate the leaves, creating a cozy atmosphere perfect for autumn evenings. Display your lanterns on mantels, tables, or window sills to enjoy their warm, seasonal glow.
Winter Snowflake Ornaments

With winter's chill in the air, crafting Winter Snowflake Ornaments is a delightful way to bring the frosty beauty of the season indoors. These delicate decorations can transform your living space into a winter wonderland, adding a touch of elegance and charm to any room. Making your own snowflake ornaments is not only fun but also a great way to personalize your holiday décor. For those living in small apartments or homes, these ornaments are an excellent way to transform your small space with minimal effort. You'll enjoy the process of creating these intricate designs, which can be as simple or as detailed as you want.
To get started, you'll need a few basic materials:
- Craft Sticks: Perfect for creating the structure of your snowflakes, they're easy to work with and widely available.
- Glue and Glitter: Use these to add sparkle and shine, giving your snowflakes a magical, icy appearance.
- Paints and Brushes: Customize your ornaments with colors that match your home's décor, whether you choose classic white or more vibrant hues.
Once you've gathered your supplies, you can start assembling your snowflakes. Arrange the craft sticks into various patterns, secure them with glue, and let your creativity flow as you paint and decorate. Your finished ornaments will bring warmth and joy to your home during the cold months.
Easter Egg Centerpieces

Spring is the perfect time to brighten up your home with vibrant Easter Egg Centerpieces. These delightful decorations not only symbolize renewal but also bring a splash of color to your dining table. Start by selecting a variety of eggs, which can be real, wooden, or plastic, depending on your preference. Dye them in pastel shades like lavender, mint, and soft pink for a classic look.
Once you've prepared your eggs, consider arranging them in a decorative bowl or basket. Layer them with moss or faux grass to add texture and a natural touch. For an elevated look, try using a glass vase and stacking the eggs alongside fresh flowers like tulips or daffodils. The combination of eggs and blooms creates an attractive and seasonal centerpiece.
You can further personalize your centerpiece by painting designs or adding stickers to your eggs. Polka dots, stripes, or floral patterns add a playful element. This DIY project is not only simple but also offers a creative outlet for you to experiment with color and design. Display your masterpiece on your dining table or mantel to welcome the season with style and charm.
Fourth of July Banners
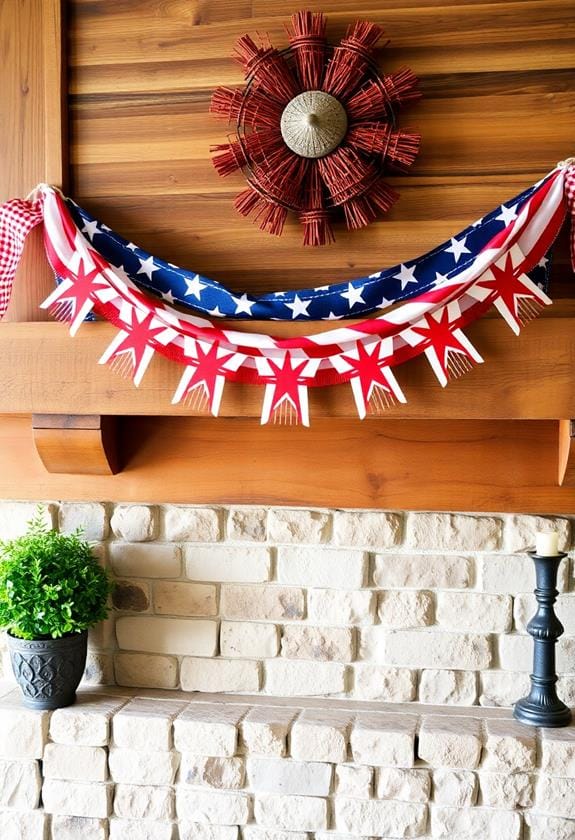
Easter's vibrant hues give way to the bold red, white, and blue of Fourth of July celebrations. This is the perfect time to create your own Fourth of July banners, adding a festive touch to your home. You'll find crafting these banners both fun and satisfying, transforming any space into a patriotic haven. Incorporating versatile decor elements can further enhance your home's festive atmosphere. Here's how you can create these eye-catching decorations.
- Materials: Gather red, white, and blue cardstock or fabric, along with some sturdy string or ribbon. A hot glue gun and scissors will come in handy, too.
- Design: Decide on the style of your banner. Triangular pennants bring a classic look, while rectangular pieces feel more modern. Cut your chosen shapes from the materials.
- Assembly: Lay out your pieces, alternating colors for a striking effect. Use the hot glue gun to attach the shapes to the string or ribbon, ensuring even spacing for a balanced appearance.
Hang your finished banner on a porch, above a mantel, or in any room that needs a splash of patriotic pride. With your creativity, these banners will capture the spirit of the holiday and delight everyone who sees them.
Halloween Pumpkin Decorations
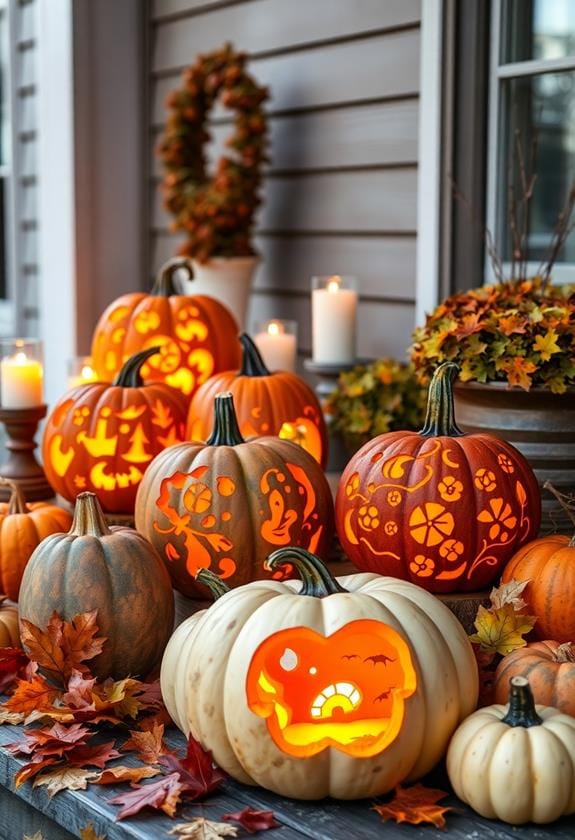
As the crisp autumn air begins to settle in, there's no better way to embrace the spooky season than by crafting your own Halloween pumpkin decorations. Whether you're a seasoned DIY enthusiast or a beginner, creating these festive accents can be both rewarding and fun. Start with the classic carved pumpkin, a staple for any Halloween decor. Choose a pumpkin with a smooth surface, and carefully carve out your spooky design using a sharp knife or pumpkin carving kit. If carving isn't your forte, consider painting your pumpkins instead. Use acrylic paint to add vibrant colors or intricate designs, such as black cats, bats, or haunted houses.
For something unique, try decorating with fabric, lace, or glitter. Wrap your pumpkin in a beautiful lace pattern or use glue and glitter to create shimmering patterns. You might also consider using decoupage techniques, applying decorative paper or tissue with a simple glue mixture for a stunning effect. Incorporate LED lights inside your pumpkins to enhance their nighttime glow, ensuring they captivate attention on your porch or windowsill. With these creative approaches, your Halloween pumpkin decorations will surely impress and delight both guests and trick-or-treaters alike.
Thanksgiving Table Runners
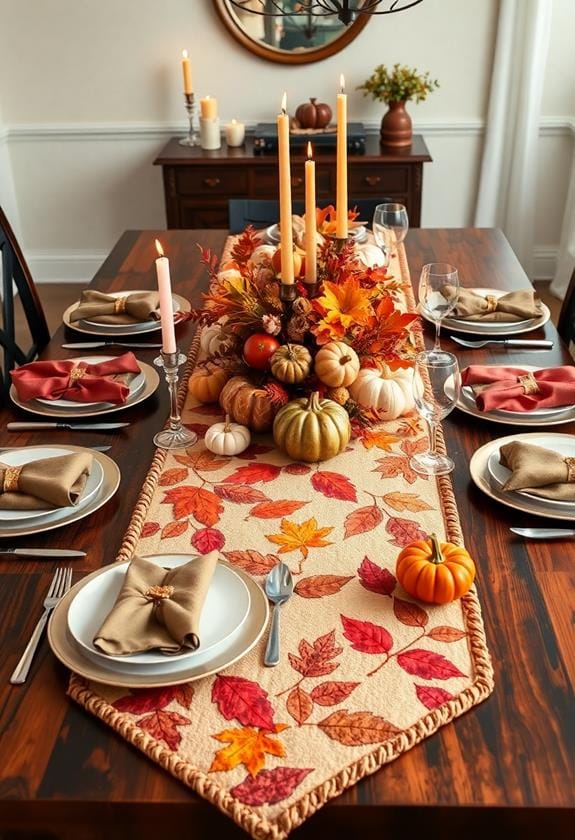
When Thanksgiving approaches, it's the perfect time to create a stunning table runner that sets the tone for your festive meal. A well-crafted table runner can transform your dining area, adding warmth and a touch of holiday charm. You'll want to start with a theme, whether it's rustic, elegant, or something in between, to guide your design choices. Consider using natural materials like burlap and linen to enhance the autumnal feel, which aligns with the rustic decor fundamentals. To create your table runner, follow these simple steps:
- Choose the fabric: Opt for burlap, linen, or cotton in earthy tones like burnt orange, deep red, or mustard yellow.
- Add embellishments: Incorporate leaves, pinecones, or small pumpkins for a seasonal touch. You can sew or glue these elements onto the fabric.
- Personalize it: Use stencils or fabric paint to add family names, Thanksgiving quotes, or simple patterns.
Once your table runner is complete, lay it across the center of your table, ensuring it hangs evenly on both sides. This decorative piece not only enhances your table's appearance but also brings a sense of unity and celebration to your gathering. With just a bit of creativity, your Thanksgiving table will be both inviting and memorable.
Christmas Tree Advent Calendars
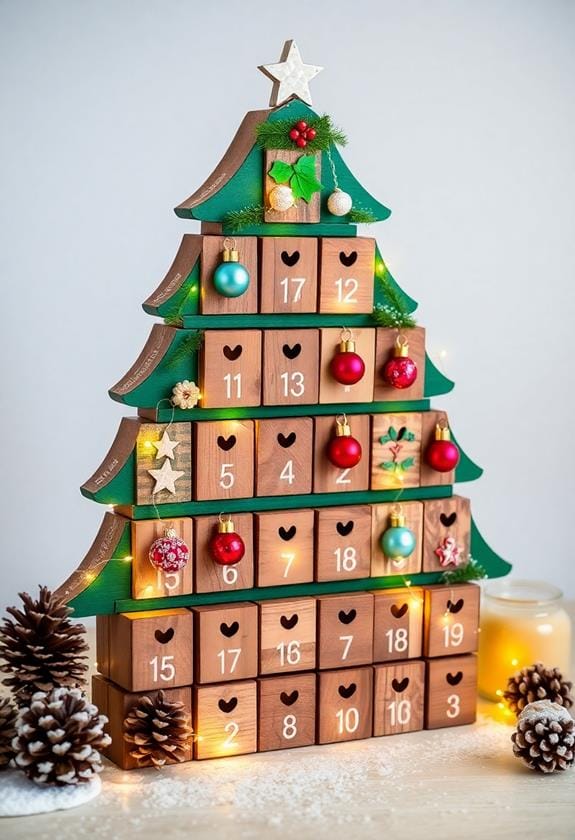
With Thanksgiving celebrations wrapped up, it's time to shift your focus to the joy of Christmas, and what better way to usher in the season than with a Christmas Tree Advent Calendar? This delightful craft not only adds charm to your home but also offers a daily dose of festive anticipation. You can create a personalized calendar that reflects your style by choosing from a variety of materials like felt, wood, or paper.
Start by deciding on the size and shape of your advent calendar, then cut out a tree silhouette using your chosen material. Felt is particularly forgiving and easy to work with, while wood adds a rustic touch. Next, create 24 small pockets or envelopes, numbering each for the countdown. Attach these to your tree in a visually pleasing arrangement. Fill the pockets with small treats, notes, or activities—anything that brings joy to your family.
To hang your calendar, consider using sturdy ribbon or twine. Display it prominently in your home where everyone can enjoy the daily surprises. This craft not only decorates your space but creates cherished holiday memories, fostering excitement throughout December.
New Year's Eve Party Hats

Amidst the glitter and excitement of New Year's Eve, why not elevate your celebration by crafting your own party hats? It's a delightful way to add a personal touch to your festivities and guarantee your guests have a memorable time. To get started, gather some essential materials and let your creativity shine. You'll need colorful cardstock or sturdy paper, a hot glue gun or strong adhesive, and embellishments like glitter, sequins, or feathers.
Here's a step-by-step guide to crafting your hats:
- Cut and Shape: Begin by cutting the cardstock into a semicircle. Roll it into a cone shape, adjusting for the desired fit, and secure with glue.
- Decorate: Now the fun part—decoration! Use glitter, sequins, or even small pom-poms to make your hats stand out. Personalize them with the year or each guest's name for a special touch.
- Add the Chin Strap: Attach an elastic band to guarantee the hats stay in place while your guests dance the night away.
Crafting these hats isn't just about the finished product; it's a chance to spend creative time with loved ones, setting the stage for a joyful New Year celebration.
Frequently Asked Questions
What Are Some Budget-Friendly DIY Home Decor Ideas for Each Season?
To decorate your home on a budget each season, think about using natural elements and repurposing materials. In spring, gather fresh flowers and make simple bouquets. For summer, create seashell garlands or paint terracotta pots. Autumn invites you to use colorful leaves and pinecones for wreaths. In winter, try making candle holders from mason jars. You don't need to spend much; creativity and personal touches make decor truly special.
How Can I Involve Kids in Making Seasonal Home Decor Crafts?
Did you know that involving kids in crafts can boost their creativity by 45%? You can engage them in seasonal home decor projects by assigning age-appropriate tasks. Let them choose colors for decorations or assemble simple pieces, like paper garlands or painted rocks. This hands-on experience not only sparks imagination but also strengthens family bonds. Encourage them to express their ideas, and soon, you'll create cherished memories together.
What Are Sustainable Materials for Seasonal Home Decor Projects?
When you're choosing sustainable materials for your projects, consider using recycled paper, natural fibers like jute or cotton, and reclaimed wood. These materials are eco-friendly, often easy to source, and can give your decor a unique, rustic charm. You can also use items like dried flowers or leaves, which decompose naturally. By opting for these choices, you not only create beautiful decor but also contribute positively to the environment.
How Can I Store Seasonal Decor Crafts to Avoid Damage?
You're battling the epic saga of storing seasonal decor without damage, aren't you? Start by using sturdy, labeled containers, ensuring they're moisture-resistant. Wrap delicate items in soft cloth or bubble wrap—treat them like fragile treasures. Store in a cool, dry space, keeping heavy items on the bottom. Consider clear bins for quick visibility. Stack cautiously, maintaining a tidy tower of seasonal cheer. With these strategies, your decor survives the off-season unscathed!
What Tools Do I Need for Basic DIY Crafting at Home?
For basic DIY crafting at home, you'll need a few essential tools. Start with a quality pair of scissors, because precision is key. A hot glue gun is invaluable for quick fixes and assembling projects. Don't forget a ruler or measuring tape for accuracy. A cutting mat protects your surfaces, while a craft knife offers precision cutting. Stock up on various brushes for painting and glue application, ensuring your projects are both neat and creative.

