Transform your home into a stylish haven with DIY stencil ideas that infuse personality and flair. Start by choosing stencils that match your space's mood—geometric for modern vibes or floral for classic charm. Use durable plastic stencils for repeat projects or paper ones for a one-time application. For painting, secure your stencil with painter's tape, using brushes or sponges with minimal paint to avoid seepage. Apply light, even coats for designs to pop, especially on walls and furniture. Experiment with contrasting colors for boldness or similar shades for a subtle touch. Explore these techniques further to perfect your decor transformation.
Key Points
- Choose stencils that match the space's style, such as geometric for modern or floral for classic decor.
- Use durable plastic stencils for multiple projects and paper stencils for single-use applications.
- Secure stencils with painter's tape and apply thin paint layers to prevent bleeding and ensure crisp edges.
- Mix different stencils for unique wall art and accents, adding personal flair to home decor.
- Clean and prepare surfaces before stenciling, and seal finished designs for longer-lasting results.
Choosing the Right Stencils

Selecting the perfect stencil can make all the difference in your DIY project. When you're choosing a stencil, think about the space you're enhancing and the mood you want to create. Consider whether you're aiming for a bold statement or a subtle accent, as this will guide your pattern selection. Geometric designs can add a modern touch, while floral motifs might bring a more classic or rustic feel to your decor. Affordable DIY projects offer great opportunities to experiment with various stencil styles without breaking the bank. It's important to match the stencil size with your project area. Large stencils work well for expansive walls or floors, while smaller designs are ideal for furniture or intricate details. Don't forget to assess the stencil's material. Durable plastic stencils are reusable and easy to clean, making them a great choice for multiple projects. Paper stencils, although less durable, can be perfect for one-time use or intricate designs.
Before finalizing your choice, also consider how the stencil design will interact with your existing decor. You want it to complement, not clash. By carefully selecting your stencil, you set the foundation for a successful DIY endeavor that enhances your home's aesthetic and reflects your personal style.
Tools and Materials Needed

Getting started with your DIY stencil project requires gathering the right tools and materials to guarantee a smooth process. First, you'll need a variety of brushes or sponges. Stencil brushes, with their flat, round tips, work best for dabbing paint evenly. Sponges provide an alternative for covering larger areas quickly. Incorporating houseplants into your decor can add a fresh, natural touch to your space. Consider checking out DIY home decor with houseplants for additional inspiration.
Next, select the appropriate paint for your surface. Acrylic paints are versatile and work well on most surfaces, while specialized paints are available for fabric or wood. You'll need painter's tape to secure your stencil in place, preventing any unwanted shifts during application. A palette or plate is essential for mixing and holding your paint. If you're working with multiple colors, make sure you have separate containers to keep them organized. A cutting mat and a craft knife are invaluable for customizing or creating your own stencil designs, offering precision and control.
Don't forget a ruler and a pencil for marking measurements and outlines on your surface. Finally, have a clean, damp cloth on hand to quickly address any paint spills or mistakes. By having these materials ready, you'll set yourself up for a successful and enjoyable DIY stencil project.
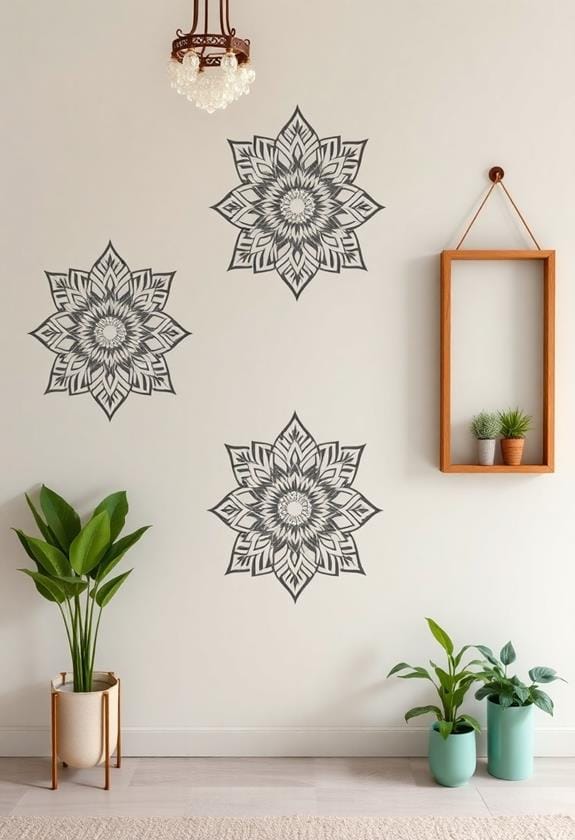
Wall Art Stencil Projects

When it comes to transforming your walls with creativity and style, wall art stencil projects offer endless possibilities. You can easily add a touch of personal flair to any room, making it truly your own. Whether you're aiming for a bold statement or a subtle accent, stencils allow you to experiment with colors, patterns, and textures in a way that's both fun and fulfilling. If you're looking for more inspiration, you might find quick DIY home decor transformations helpful in sparking your creativity.
Start by choosing a design that resonates with your aesthetic, perhaps something geometric for a modern look, or floral for a classic touch. Confirm your stencil is securely taped to the wall to prevent any paint from bleeding underneath. Use a stencil brush or a foam roller, applying paint in thin layers to avoid drips. Remember, patience is key—let each layer dry before applying the next.
Consider your wall's existing color; contrasting shades can make your design pop, while similar tones create a more understated effect. Don't be afraid to mix and match different stencils, creating a unique composition that reflects your personality. With stencils, your walls become a canvas, and your imagination sets the limits, turning ordinary spaces into extraordinary showcases of art.
Furniture Makeover Techniques

Transforming your furniture can breathe new life into your space and reflect your unique style. Start by choosing a piece that needs a fresh look—perhaps an old dresser or a plain coffee table. Sand the surface lightly to guarantee the paint adheres properly, and wipe it clean to remove dust. Next, select a stencil design that suits your taste, whether it's a geometric pattern or a floral motif. Many DIY home decor websites offer a variety of stencil designs to choose from, making it easier to find something that matches your vision. Position your stencil on the furniture and secure it with painter's tape to prevent slipping.
Using a foam roller or a stencil brush, apply paint over the stencil, being careful not to overload the brush to avoid bleeding. It's best to use light, even strokes, building up the color gradually. Once the paint is dry, carefully lift the stencil to reveal your design. If you want to add depth, consider layering different stencil designs or using contrasting colors.
Seal your work with a clear varnish or wax to protect the finish, guaranteeing it lasts longer. This simple yet effective technique allows you to customize your furniture, making it a true reflection of your personal style and creativity.
Customized Textile Designs

After revamping your furniture, why not extend that creativity to your textiles? Customized textile designs offer a wonderful way to infuse personality into your home decor. Grab some fabric paint, a few stencils, and let your imagination run wild. Whether it's curtains, pillowcases, or tablecloths, stenciling your textiles allows you to create one-of-a-kind pieces that reflect your style. Consider exploring simple sewing techniques to enhance your textile projects even further, adding layers of customization to your decor.
Start by choosing a stencil pattern that complements your existing decor. Geometric shapes add a modern touch, while floral motifs bring a softer, more traditional feel. Secure the stencil on the fabric using painter's tape to prevent any movement during the process. Using a sponge or a stencil brush, apply fabric paint evenly, making sure you don't overload your brush, which can cause smudging.
Once you've finished painting, remove the stencil carefully to reveal your design. Allow the paint to dry thoroughly, then heat set it with an iron to guarantee the design lasts through washes. This step is essential for durability. With just a few tools and some patience, you can transform plain textiles into eye-catching decor pieces that make your space uniquely yours.
Floor Stenciling Ideas

Imagine stepping into a room where the floor itself tells a story. With floor stenciling, you can transform any plain surface into an artistic canvas, adding character and depth to your space. It's a cost-effective way to mimic the look of expensive tiles or create your designs, turning your floor into a unique masterpiece. First, choose a stencil pattern that complements your existing decor. Geometric patterns, floral designs, or even intricate mandalas work beautifully, offering visual interest without overwhelming the room. For those working with compact areas, small space transformations can be particularly impactful, making the room feel larger and more cohesive.
Once you've selected your stencil, prepare your floor by cleaning it thoroughly and ensuring it's smooth and dry. Use painter's tape to secure your stencil in place, then apply paint with a dense foam roller or stencil brush. Light, even coats prevent bleeding under the stencil, and you can layer colors for added dimension. Let each layer dry completely before moving to the next section.
Floor stenciling suits any room, from the kitchen to the bedroom, introducing a personal touch that standard flooring can't offer. By dedicating some time and patience, you'll create a stunning visual feature that invites admiration and complements your home's style effortlessly.
Creative Stenciled Accents

Once you've mastered the art of floor stenciling, it's time to explore the world of creative stenciled accents throughout your home. These accents can transform ordinary items into standout features, adding a unique touch to your decor. Consider stenciling the back of a bookshelf to create a striking backdrop for your books and decor pieces. Choose a pattern that complements the room's theme, and watch as it ties everything together beautifully.
Another option is to stencil pillow covers, providing an easy way to refresh your living space without a complete overhaul. Select fabric paint and your favorite stencil design, and you'll have custom pillows that reflect your personal style. For an unexpected twist, try stenciling lamp shades. This subtle touch can cast intriguing shadows and add depth to your lighting.
Don't forget about small furniture pieces like stools or side tables. A carefully chosen stencil can breathe new life into these items, making them conversation starters. By incorporating stenciled accents, you can subtly enhance your home's personality and cohesion. Let your creativity guide you, and enjoy the process of making your space truly your own.
Tips for Perfect Stenciling

Everyone wants their stenciling projects to look professional, and with a few simple tips, you can achieve flawless results. First, make certain to secure your stencil firmly. Use painter's tape to hold it in place; this prevents any shifting that could blur your design. To avoid paint seeping under the stencil, use a minimal amount of paint. Dip your brush or sponge lightly, then dab off excess on a paper towel. This guarantees a crisp edge.
When applying paint, use a stippling or dabbing motion rather than brushing. This technique helps keep the paint from bleeding under the stencil's edges. If you're looking to elevate your space, consider incorporating modern design elements like geometric shapes or abstract patterns into your stenciling. Work slowly and patiently, especially around intricate designs. If you're layering colors, allow each layer to dry completely before moving on to the next to prevent smudging.
For a clean finish, gently lift the stencil straight up once your paint is dry. Clean your stencils immediately after use to preserve their quality and make certain they're ready for your next project. Finally, practice on a scrap piece before you start on your actual surface. With these tips, you're well on your way to creating beautiful, professional-looking stencils at home.
Frequently Asked Questions
How Can I Create My Own Unique Stencil Designs?
To create your own unique stencil designs, start by sketching your ideas on paper. Choose a simple, bold design that translates well into a stencil. Once you've finalized your design, transfer it onto a piece of sturdy material like acetate or plastic sheets. Carefully cut out the shapes using a craft knife, ensuring clean edges. Test your stencil on scrap material first to refine your technique and make any necessary adjustments before actual use.
What Are Common Mistakes to Avoid When Using Stencils?
When using stencils, avoid common mistakes like not securing the stencil properly, which can lead to paint bleeding. Use painter's tape to hold it firmly in place. Don't rush the painting process; applying too much paint at once causes smudging. Instead, dab lightly with a sponge or brush. Also, make certain the stencil is clean and dry before reuse, as leftover paint can transfer onto your new project, ruining the design.
How Do I Maintain Stencils for Repeated Use?
An ounce of prevention is worth a pound of cure, so keeping your stencils in good shape is vital. After each use, gently wash them with warm, soapy water to remove paint residue, then lay them flat on a towel to dry completely. Avoid bending them to prevent warping. Store them flat or hang them in a dry place to keep them intact. Regular maintenance guarantees they'll last for many creative projects.
Can Stencils Be Used on Outdoor Surfaces?
Yes, you can use stencils on outdoor surfaces, and they can add a charming touch to your exterior decor. It's important to choose weather-resistant materials for both the stencil and paint to guarantee durability. Clean the surface thoroughly before starting, so the stencil adheres properly, and use painter's tape to secure it. Once you're done, a clear sealant will protect your design from the elements, keeping it vibrant and long-lasting.
What Are the Best Practices for Layering Multiple Stencil Designs?
Layering stencil designs is like painting a symphony; each layer adds depth and harmony. Start by ensuring each layer dries completely before adding the next to prevent smudging. Use contrasting colors to make each design pop, and align your stencils carefully for precision. Test your layering on a scrap material first to see how colors and patterns interact. This practice helps you anticipate any unexpected outcomes, ensuring your final piece is cohesive and stunning.


